The floor stingers need to be painted on all six edges so it was easier to do that before installing them. The ends actually weren’t painted because they will be epoxied in (which is a universal primer) and then painted. The photo above also shows the initial coats of enamel in the bilge below the galley.
The forward Head seemed like it would be easier since the pieces are smaller, but that didn’t turn out to be the case since the hull here is a compound angle in that it curves up along the outside and up as it goes forward. But by putting the forward-most and aft-most stringer in first, allowed me to put a board across them to make sure they are all on the same plane.
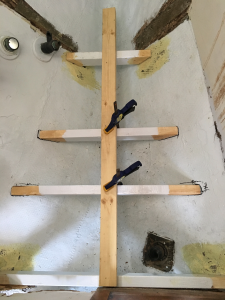
Remember that being a boat, “level” isn’t really a thing. Things just need to be “relatively level” in the truest sense of “relative” since it really only matters that each stringer in a room be level with every other one in that room. I should pause here a say that “Floor Stringers” are what the floor will be mounted to. Sometimes called “floor joists” in a house. In the case of a boat they effectively what turns part of the hull into the bilge. the bilge being the lowest part of the hull, where any water enters the boat ends up because: gravity and is then pumped out by the arbitrarily named “bilge pump”. So the part of the hull above the floor (on a boat, called a sole) is a bulkhead (boaty word for wall) and anything below the floor containing a pump is a bilge (boaty word for leaky basement).
To attach them, with them clamped in position to the board spanning the fore and aft stringers that are already in place, I just globbed a bunch of thickened epoxy onto the ends and set the whole thing in place as shown above. This squished out any excess epoxy that I then cleaned up like you do calk. Technically this is known as creating a “billet” or something like that. Then a little fiberglass cloth to smooth it to the hull and that’s about it.
The process was repeated in the berthing area.
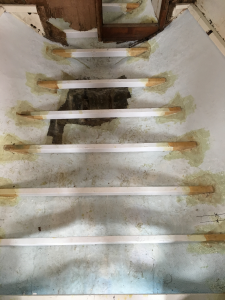
For those interested, I did use a level to ensure the stringers were level athwartship (boaty word for across the boat port to starboard (left to right)). And I made sure the distance between them was somewhat uniform from one end to the next and from one to the next. But let’s face it, there’s no reason I can thin of for this to be exact. I won’t say it was easy, but it is strong and it looks almost like I know what I’m doing when it’s all done.
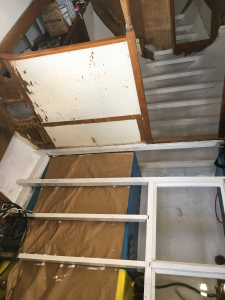
Pictured here, the Galley Stringers have been painted and the bilge has a few more coats on it. The tanks have been painted blue and yellow for water and diesel respectively. I’ll get a better picture of that without the drop cloth sometime.


Leave A Comment